{"meta":{"title":"끌어오기 요청 만들기","intro":"리포지토리에서 코드 변경 내용을 제안하는 끌어오기 요청을 만듭니다.","product":"끌어오기 요청","breadcrumbs":[{"href":"/ko/enterprise-server@3.22/pull-requests","title":"끌어오기 요청"},{"href":"/ko/enterprise-server@3.22/pull-requests/how-tos","title":"사용법"},{"href":"/ko/enterprise-server@3.22/pull-requests/how-tos/create-pull-requests","title":"끌어오기 요청 만들기"},{"href":"/ko/enterprise-server@3.22/pull-requests/how-tos/create-pull-requests/creating-a-pull-request","title":"끌어오기 요청 만들기"}],"documentType":"article"},"body":"# 끌어오기 요청 만들기\n\n리포지토리에서 코드 변경 내용을 제안하는 끌어오기 요청을 만듭니다.\n\n끌어오기 요청에 대한 새 분기를 만들지만 리포지토리에 대한 쓰기 권한이 없는 경우 먼저 리포지토리를 포크할 수 있습니다.\n[포크에서 끌어오기 요청 만들기](/ko/enterprise-server@3.22/pull-requests/how-tos/create-pull-requests/creating-a-pull-request-from-a-fork) 및 [포크들](/ko/enterprise-server@3.22/pull-requests/reference/forks)을(를) 참조하세요.\n\n끌어오기 요청을 만들 때 변경 내용을 병합할 분기를 지정할 수 있습니다. 풀 리퀘스트는 서로 다른 두 브랜치 사이에서만 생성할 수 있습니다.\n\n끌어오기 요청을 문제에 연결하여 수정이 진행 중임을 표시하고 끌어오기 요청이 병합될 때 자동으로 문제를 닫을 수 있습니다. 자세한 내용은 [끌어오기 요청을 이슈에 연결](/ko/enterprise-server@3.22/issues/tracking-your-work-with-issues/using-issues/linking-a-pull-request-to-an-issue)을(를) 참조하세요.\n\n## 끌어오기 요청 만들기\n\n\n\n1. GitHub에서 리포지토리의 기본 페이지로 이동합니다.\n\n2. “분기” 메뉴에서 커밋이 포함된 분기를 선택합니다.\n\n \n\n3. 파일 목록 위의 노란색 배너에서 **비교 및 끌어오기 요청**을 클릭하여 연결된 분기에 대한 끌어오기 요청을 만듭니다.\n\n \n\n4. *기본* 분기 드롭다운 메뉴를 사용하여 변경 내용을 병합할 분기를 선택합니다. 그런 다음 분기 *비교* 드롭다운 메뉴를 사용하여 변경한 토픽 분기를 선택합니다.\n\n5. 끌어오기 요청의 제목과 설명을 입력합니다.\n\n6. 검토할 준비가 된 끌어오기 요청을 만들려면 **끌어오기 요청 만들기**를 클릭합니다.\n 초안 끌어오기 요청을 만들려면 드롭다운을 사용하고 **초안 끌어오기 요청 만들기**를 선택한 다음, **초안 끌어오기 요청**을 클릭합니다. 조직의 구성원인 경우 조직 소유자 초안 끌어오기 요청에 대한 액세스를 요청해야 할 수도 있습니다.\n [끌어오기 요청](/ko/enterprise-server@3.22/pull-requests/reference/pull-requests#draft-pull-requests)을(를) 참조하세요.\n\n> \\[!TIP]\n> 끌어오기 요청을 만든 후 특정 사용자에게 제안된 변경 내용을 검토하도록 요청할 수 있습니다.\n> [끌어오기 요청 검토 요청](/ko/enterprise-server@3.22/pull-requests/how-tos/create-pull-requests/requesting-a-pull-request-review)을(를) 참조하세요.\n\n끌어오기 요청을 검토한 후 리포지토리에 병합할 수 있습니다.\n[끌어오기 요청 병합](/ko/enterprise-server@3.22/pull-requests/how-tos/merge-and-close-pull-requests/merging-a-pull-request)을(를) 참조하세요.\n\n
\n\n\n\n> \\[!NOTE]\n> GitHub CLI에 대한 자세한 내용은 [GitHub CLI 정보](/ko/enterprise-server@3.22/github-cli/github-cli/about-github-cli)을(를) 참조하세요.\n\n끌어오기 요청을 만들려면 `gh pr create` 하위 명령을 사용합니다.\n\n```shell\ngh pr create\n```\n\n개인에게 끌어오기 요청을 할당하려면 `--assignee` 또는 `-a` 플래그를 사용합니다.\n`@me`을 사용하여 끌어오기 요청을 자체 할당할 수 있습니다.\n\n```shell\ngh pr create --assignee \"@octocat\"\n```\n\n끌어오기 요청을 병합할 분기를 지정하려면 `--base` 또는 `-B` 플래그를 사용합니다. 끌어오기 요청에 대한 커밋이 포함되어 있는 분기를 지정하려면 `--head` 또는 `-H` 플래그를 사용합니다.\n\n```shell\ngh pr create --base my-base-branch --head my-changed-branch\n```\n\n새 끌어오기 요청에 대한 제목과 본문을 포함하려면 `--title` 및 `--body` 플래그를 사용합니다.\n\n```shell\ngh pr create --title \"The bug is fixed\" --body \"Everything works again\"\n```\n\n끌어오기 요청을 초안으로 표시하려면 `--draft` 플래그를 사용합니다.\n\n```shell\ngh pr create --draft\n```\n\n새 풀 리퀘스트에 레이블 또는 마일스톤을 추가하려면 `--label` 및 `--milestone` 플래그를 사용합니다.\n\n```shell\ngh pr create --label \"bug,help wanted\" --milestone octocat-milestone\n```\n\n특정 프로젝트에 새 끌어오기 요청을 추가하려면 `--project` 플래그를 사용합니다.\n\n```shell\ngh pr create --project octocat-project\n```\n\n개인 또는 팀을 검토자로 할당하려면 `--reviewer` 플래그를 사용합니다.\n\n```shell\ngh pr create --reviewer monalisa,hubot --reviewer myorg/team-name\n```\n\n기본 웹 브라우저에서 끌어오기 요청을 만들려면 `--web` 플래그를 사용합니다.\n\n```shell\ngh pr create --web\n```\n\n
\n\n\n\n1. \\*\\* 끌어오기 요청 미리 보기\\*\\*를 선택하세요.\n GitHub Desktop 는 현재 분기와 기본 분기 간의 변경 내용을 보여 주는 미리 보기 대화 상자를 엽니다.\n\n 또는 끌어오기 요청을 만들려면 GitHub 드롭다운 아이콘을 선택하고 **끌어오기 요청 만들기**를 클릭합니다.\n\n2. **base:** 드롭다운 메뉴에서 변경 사항을 병합하려는 브랜치가 선택되어 있는지 확인하세요.\n\n 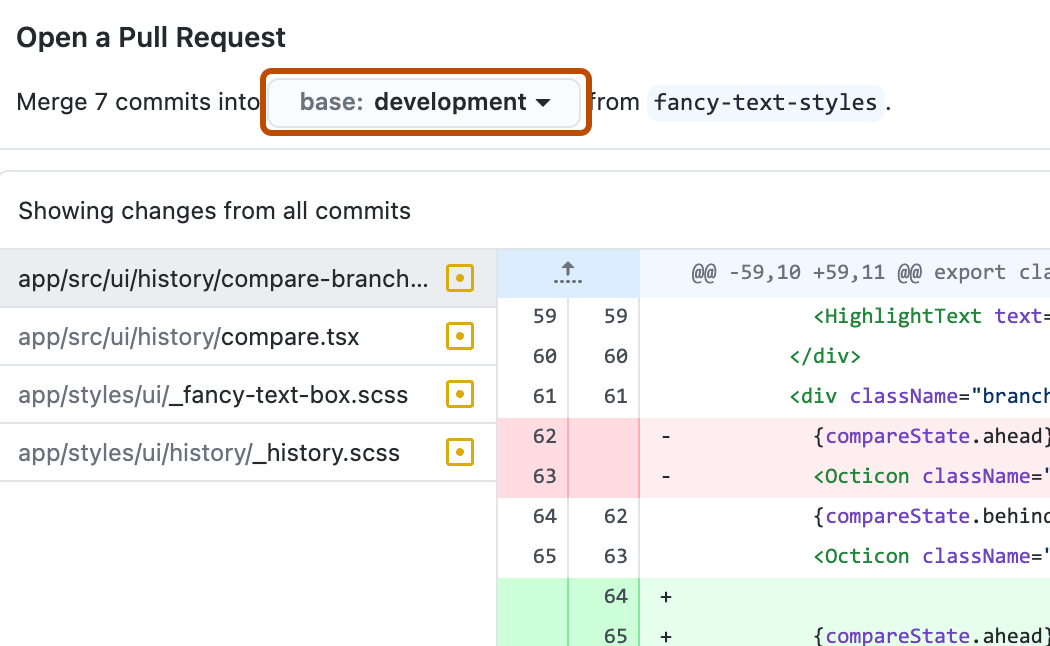\n\nGitHub Desktop 는 현재 분기를 기본 분기에 자동으로 병합할 수 있는지 여부를 알려줍니다.\n\n\n\n1. **끌어오기 요청 만들기**를 클릭합니다.\n GitHub Desktop 기본 브라우저를 열고 GitHub로 이동합니다.\n2. 끌어오기 요청의 제목과 설명을 입력합니다.\n3. 검토할 준비가 된 끌어오기 요청을 만들려면 **끌어오기 요청 만들기**를 클릭합니다.\n 초안 끌어오기 요청을 만들려면 드롭다운을 사용하고 **초안 끌어오기 요청 만들기**를 선택한 다음, **초안 끌어오기 요청**을 클릭합니다. 조직의 구성원인 경우 조직 소유자 초안 끌어오기 요청에 대한 액세스를 요청해야 할 수도 있습니다.\n [끌어오기 요청](/ko/enterprise-server@3.22/pull-requests/reference/pull-requests#draft-pull-requests)을(를) 참조하세요.\n\n
\n\n## 끌어오기 요청에서 파일 변경\n\n끌어오기 요청을 연 후 헤드 분기에 새 커밋을 추가하여 파일을 계속 변경할 수 있습니다.\n\n\n\n## 추가 읽기\n\n* [포크에서 끌어오기 요청 만들기](/ko/enterprise-server@3.22/pull-requests/how-tos/create-pull-requests/creating-a-pull-request-from-a-fork)\n* [끌어오기 요청을 베이스 분기와 동기화 상태로 유지](/ko/enterprise-server@3.22/pull-requests/how-tos/create-pull-requests/keeping-your-pull-request-in-sync-with-the-base-branch)\n* [끌어오기 요청의 기본 분기 변경](/ko/enterprise-server@3.22/pull-requests/how-tos/create-pull-requests/changing-the-base-branch-of-a-pull-request)\n* [문제 만들기](/ko/enterprise-server@3.22/issues/tracking-your-work-with-issues/using-issues/creating-an-issue)\n* [다른 GitHub 사용자에게 문제 할당 및 끌어오기 요청](/ko/enterprise-server@3.22/issues/tracking-your-work-with-issues/using-issues/assigning-issues-and-pull-requests-to-other-github-users)\n* [GitHub에 쓰기](/ko/enterprise-server@3.22/get-started/writing-on-github)"}